Irrigation and Expansive Soils
What is Expansive Soil?
Expansive soils can be found in many areas. Expansive soils expand in size when they get wet, and then shrink as they dry out. As the soil expands and contracts it can create enough force to cause major damage to building foundations, patios, and sidewalks. Expansive soils are also sometimes called shrink-swell soils, swelling soils, adobe, clay, or caliche soils. The damage caused by expansive soil is similar to that of frost heave found in northern regions, but it is NOT the same thing!
Identifying Expansive Soil
Soil that cracks or fractures when it dries is often a sign that it is expansive; however a lack of cracks does not necessarily indicate that the soil is not expansive. Other expansive soils take on a popcorn like appearance when they dry, they look like someone spread little lumps of popcorn shaped dirt on the soil surface. Expansive soils are often clay like, becoming very sticky when wet and hard and brittle when dry. The best way to determine if the soil at a location is expansive is to have an expansion test performed by a soil expert. Expansive soils are common in desert areas, and also in river bottoms or valleys formed by sediment. They typically form in areas that were once covered by seas or lakes. For example, they are commonly found in the deserts of Arizona, the valleys of Colorado, and coastal plains like the Los Angeles Basin and the low lying areas around San Francisco Bay. Often your local government building department can tell you if the soil in your area is known to have expansion problems. Links at the bottom of this page lead to websites with maps of expansive soil areas and more information on expansive soils.
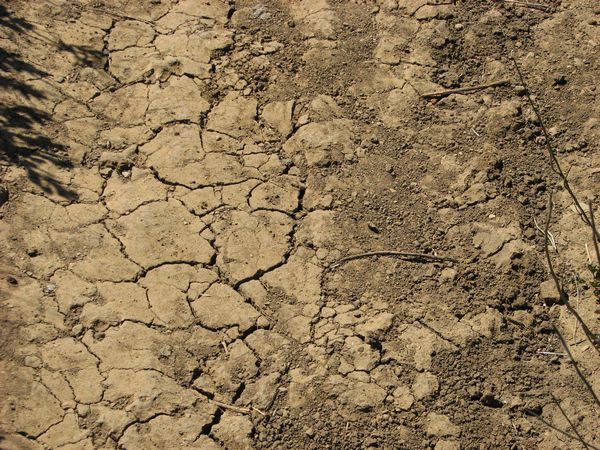
Typical cracking of expansive soil when dry.
Limitations of this Article
Use of this information is at your own risk. Expansive soils vary widely so all I can offer here are broad ideas for ways to deal with it. You will need to decide for yourself the appropriateness of these ideas to your situation. If your soil is extremely expansive you should have a Soils or Geotechnical Engineer advise you on ways to deal with it (they are most often listed under the headings "Engineers - Geotechnical" and/or "Engineers - Soils" in your local phone directory.) Because of the extreme and costly damage that can result from soil expansion, you need to use extreme care in how you deal with it. Please see the Terms of Use for this website.
Water and Expansive Soils
Expansive soils either expand or contract as the amount of water or moisture in them changes. It doesn't matter if the water is from rainfall or irrigation; the damage is the same either way. In a very simplified explanation, the soil pulls water into it, where the water is stored between the tiny soil particles. Since the water takes up space between the soil particles, the area occupied by the soil expands. The key to controlling damage is to keep the moisture level in the soil next to and under foundations, sidewalks or patios at a uniform level of moisture at all times. If the soil is dry, you want to keep it dry, if it is slightly wet, you want to keep it slightly wet. The amount of moisture in the soil isn't nearly as important as avoiding changes in the moisture content of the soil.
Concrete Materials
When expansive soils are present it is important to use reinforced concrete to resist the soil movement. This is important because no matter how careful you are, there will be at least some minor soil expansion, and you must be prepared for it. Building and wall foundations should be designed by a qualified engineer. This is not a place to cut corners! Seek out qualified help for the design of foundations. Repair of building damage caused by soil movement can be horrifyingly expensive!
All concrete, including sidewalks and patios, should contain steel reinforcement materials such as rebar and steel mesh. Placing steel in the concrete strengthens it and reduces concrete heaving and cracking. Concrete patios should also have thickened edges with rebar in them to resist soil movement. A local licensed architect, landscape architect, engineer, or concrete contractor can advise you on the necessary thickness of the reinforced edge and the type and quantity of steel mesh and rebar to use. Be sure to discuss with them your budget, and how much cracking and heaving you are willing to accept. Often a compromise is required between cost and having a perfect concrete surface.
The use of concrete pavers or bricks is another option for patios and sidewalks in areas with expansive soils. The pavers are installed without mortar. As the soil expands and contracts the pavers simply move with the soil. The disadvantage of this is that the surface may become very uneven as the pavers move and shift. The advantage is that the pavers generally don't crack like concrete. Another advantage is that if the pavers become uneven you can remove and reinstall them. Removing and reinstalling them is a lot of work, of course!
Controlling Soil Expansion
The most obvious way to keep expansive soils from expanding is to keep water off of them. Rainwater from roofs should be collected in gutters and then piped away from the building. Drainage should direct water away from buildings. The soil should slope away from buildings for at least 5 feet out from the wall, further is better. While this has nothing to do with irrigation, I mention it because it is important to keep all water away from the building, not just irrigation water. Also keep trees and large shrubs at least 10 feet from buildings as the roots can remove moisture from the soil next to the building and cause it to shrink and collapse.
One way that expansion of soils is controlled by architects and engineers is by mixing lime or other anti-expansion products into the soil. Irrigation water will leach lime and other materials out of the soil, which defeats the purpose of the treatment. Be sure to check to see if the soil under your foundation was treated with lime or a similar anti-expansion material prior to building the structure. If the soil was treated, you need to keep irrigation water away from the treated areas if possible. If possible consult with the building designer as to how far away you need to keep the irrigation from the treated area. If you can't get a recommendation, keep the irrigation at least 5 feet away. Aprons around the building, as described further below, are a good solution when the soil has been treated.
Another way that engineers deal with expansive soil is to remove the soil and then reinstall it in severely compacted layers (usually with lime added), or just totally replace it with non-expansive soil hauled in from someplace else. This is fairly common in residential building. Normally the soil within 3 to 5 feet of the building foundation will be replaced to a depth of 4 or 5 feet. Be careful not to mix soil from elsewhere around the site with this soil. Also be careful not to mix soil amendments into this area as they will change the non-expansive soil properties. It is best to simply not plant anything within 5 feet of the building foundation. Remember that even if the soil around the building has been replaced or treated, you will still have to deal with expansive soil problems under your driveways, sidewalks and patios.
Finally, architects and engineers may seek to control soil expansion by use of irrigation to help maintain a constant moisture level in the soil. This is a bit tricky because if the irrigation ever fails for any reason, expansion or contraction will occur. This method also requires almost pinpoint accuracy in scheduling irrigation. In the real world this is pretty much impossible to achieve.
Most often some type of compromise solution utilizing several of the above methods of controlling soil expansion is used. In these compromise solutions all water (both from irrigation and rainfall) is kept out of a "no-water zone" that extends at least 3 feet away from the foundation, and often 5 feet. Typically an impermeable apron of some sort is used for this. Then irrigation is used at the edge of this "no-water zone" to maintain a reasonably constant moisture level surrounding it. The following paragraphs look at methods of keeping the "no-water zone" dry and irrigating the edge of the "no-water zone".
Concrete Aprons
Probably the best method of keeping water away from the building foundations is to use an impermeable apron around the building to keep water away from the foundation. One way this is done is to pour a concrete "apron" all the way around the foundation. The apron needs to extend between 3-5 feet out from the foundation. A plastic moisture barrier sheet is placed under the concrete, because concrete is not water-proof and moisture will seep through it. Also water will flow through the concrete at cracks and expansion joints. It is important that the surface of the concrete apron is sloped so water drains out away from the building and does not pool on the concrete surface. When using a concrete apron you need to understand that the expanding soil will break the concrete apron, and cause it too heave. The only purpose for this concrete is to keep water away from the foundation; it is not intended for use as a sidewalk or patio. It is accepted that soil expansion and contraction due to water seeping under the concrete will result in the concrete becoming uneven and broken! If you want plants up next to the building, put plants in containers on top of the apron. If you want to reduce damage to the concrete apron, add a moisture barrier at the outer edge of it as described below.
Plastic/Rubber Aprons
Another way to keep the perimeter areas dry is to use a plastic or rubber barrier and then cover it with rocks, gravel, bark, or some other loose material. This is often visually more pleasing than the concrete apron above, as the loose material covering the apron does not develop ugly cracks, like concrete. The downside to plastic is that it is not as permanent, yearly checks are needed to make sure the plastic does not have tears or holes in it, and the plastic must be periodically replaced as it will wear out over time. Rubber is more durable but also breaks down over time. The thickest plastic/rubber that can be afforded should be used, thicker material will hold up longer. 20mil thick plastic/rubber is often the minimum thickness used. This plastic/rubber material is often sold for use as pond liners. The plastic/rubber apron must be glued at the top to the edge of the foundation so that water will not enter between the barrier and the foundation. Use high-quality glue or double-stick tape that remains flexible when dry. All joints in the plastic/rubber should be overlapped by at least 8 inches and glued or taped together. The plastic/rubber should not be exposed to any sunlight, as sunlight will make it wear out much faster. Cover the plastic/rubber completely with something to keep sunlight off of it. Generally the covering material is at least 3 inches deep over the plastic/rubber. If you cover the barrier with dirt it is likely weeds will grow and create holes in it, so dirt or soil is not a good choice. It is very important to not let weeds grow on top of the plastic/rubber. If you put potted plants on top of the apron area, check often to make sure roots are not growing out of the pots and down into the barrier!

Typical Apron Detail, click on detail to print.
Moisture Barriers
Moisture barriers are most often used to reduce expansion damage to less important structures like hardscape. (Paved landscape features like driveways, sidewalks, and patios are called hardscape. Hardscape can be made from many materials, such as concrete, bricks, flagstone, etc.) Moisture barriers are also used in areas where the soil is only minimally expansive. A moisture barrier keeps water from seeping sideways under the adjacent hardscape, but does not keep water away from the edges of the hardscape. This reduces lifting of the hardscape surface by the expansive soil. It does not prevent the adjacent soil from moving the hardscape sideways, which is why it is not suitable for areas with highly expandable soil. A moisture barrier is a sheet of thick plastic or metal set vertically along the edge of the hardscape. The moisture barrier typically extends at least 24 inches in depth; often 36" deep barriers are used. The moisture barrier must be glued at the top to the edge of the hardscape so that water will not enter between the barrier and the hardscape. Use high-quality glue or double-stick tape that remains flexible when dry. Moisture barriers should be checked at least once a year to assure the barrier is still firmly glued to the edge of the hardscape. Moisture barriers need to be continuous with no gaps, cracks, or unglued joints between the sections. Typically the moisture barrier sections are both overlapped and glued or taped together at any joints. It is critical that water not be able to get through or behind the barrier. The moisture barrier needs to be thick enough that roots will not easily grow through it and create holes in it. Often 20mil and thicker plastic is used. If metal is used for the moisture barrier it should not be something that will rust.

Typical Moisture Barrier Detail, click on detail to print.
Using Irrigation to Maintain Uniform Moisture
Often Geotechnical Engineers will recommend that irrigation be used to maintain "uniform soil moisture" levels. The theory is that if the moisture level stays uniform at all times, the soil will neither expand nor contract. This is easier to say than it is to do. While irrigation can maintain the needed water in the soil, it takes a top quality irrigation system to apply the water uniformly and it takes skill in timing the irrigations to keep the amount of water in the soil constant and uniform. If the irrigation system is not maintained and operated very carefully, it can worsen the problem rather than help. Remember that the key is keeping the soil moisture at a constant, uniform level. If you decide to keep the soil stable by keeping it moist, you must always keep it at exactly the same level of moistness. If it is ever allowed to dry out or become over-saturated it may cause damage. Because using irrigation to maintain uniform soil moisture is difficult, it is best to use irrigation only in combination with the use of a apron or moisture barrier as described below.
Maintaining Water Uniformity in the Soil
Water content of irrigated soil varies tremendously. Immediately after irrigation the water content is very high, and then it recedes with time until the next irrigation. This is true of both sprinklers and drip systems, but sprinklers add even greater variability than drip. As the water moves down through the soil and away from the heat of the sun and air circulation, it disperses. As a result the moisture level in the soil tends to stabilize and become relatively uniform. Stable and uniform soil moisture is exactly what is desired for reducing the soil expansion problems. This is the reason that foundations of buildings on expansive soil are often 3 or 4 feet deep, extending down to where the soil moisture levels are more stable. But often a 3-4 foot deep foundation is not practical, or for whatever reason was not utilized. Fortunately, water also moves sideways through the soil, not just down. So we can mimic this "soil depth effect" at the surface to some degree by sealing the surface so that water neither enters it nor evaporates from it. This way the water can move sideways out from our irrigation source, and as with moving down, the moisture level will become more stable and uniform as we move away from the water source. All we need to do is block water from entering or leaving the soil at the surface level. This is the theory behind the use of concrete and plastic aprons described above. An apron 3 to 5 feet wide is placed around the entire building. Irrigation is installed at the outer edge of this apron. This keeps the irrigation well away from the foundation and helps maintain moisture levels more uniform near and under the building or patio. When water from rainfall or irrigation enters the soil, it moves sideways through the soil, by capillary action, under the edge of the apron. By the time it has moved 3-5 feet sideways under the apron, the moisture level is dispersed and reasonably stable and constant.
It is critical that the irrigation system be run at regular intervals to keep the moisture level stable. I strongly suggest the irrigation be automated with a timer and checked regularly. You can also use automatic soil moisture sensors to control the irrigation. There are many available on the market, but my experience has been that they are not fool-proof. You can't just set them and forget them. The oldest type is called Tensiometers. There are also solid state sensors that require less maintenance than the older style Tensiometers. There are constant arguments in the industry as to which is better; I really don't have an opinion on this. They are heavily influenced by local conditions, particularly soil type and salt content; you will need to do some research to find the one best for your situation. Many of the soil moisture sensors are designed to keep the moisture from dropping below a given level, but do not guard against too much water in the soil.
Drip Irrigation
It is my opinion that you will get the most uniform moisture applications from a drip system. It is important that the drip system uses evenly spaced emitters, generally around 12 inches apart on the tube. There are a number of products that come with emitters pre-installed on a tube at regular intervals. Or you can buy the emitters and tube separate and install them on the tube yourself at uniform spaces. The drip tubes should not be buried unless you use one of the types that use chemicals to prevent root intrusion into the emitters. The only two I know of are Techline (with Techfilter) by Netafim, and DL-2000 by Toro. The drip tube is typically installed 12" from the edge of the apron. See the Drip Irrigation Design Guidelines for more help with a drip system design. Remember, uniformity of water application is critical to control expansive soils so proper design is very important.
Soaker Hose
Soaker hoses tend to not give very uniform distribution of moisture, and they have a rather limited life span. They may be appropriate for a short term temporary solution prior to installing a more permanent irrigation system. I wouldn't consider a soaker hose for a permanent solution. If you do use them, the design and operation is similar to drip systems.
Sprinkler Irrigation
Sprinklers may also be used for irrigation around the apron; however the sprinkler spacing must be head-to-head at the edge where the water application needs to be as uniform as possible. Head-to-head means that one sprinkler sprays all the way to the next. So if the sprinkler radius is 12 feet, they should be placed no more than 12 feet apart. The sprinkler heads should be placed at least 6" away from the edge of the apron. See the Sprinkler Irrigation Design Tutorial for information on designing a high quality irrigation system. Remember, uniformity of water application is critical to control expansive soils so proper design is very important.
Additional Resources on the Web
Here are some good resources for additional study:
Colorado State University Extension- Horticulture Article on expansive soils by C.R. Wilson, J.G. Davis and N. Mejia for Colorado State University Extension- Horticulture.
Missouri University of Science and Technology A very good article on expansive soils with case studies and solutions for foundations and swimming pools. A must-read article if you plan to build a swimming pool in an expansive soil.